One of the hardest and trickiest settings to deal with a 3D printer is the temperature. You have to get the perfect temperature in your CURA settings to get the best possible results. Now, this temperature varies based on the filament material you use.
A temperature tower makes your life much easier with that prospect. Wondering what is it and how does it work? Don’t worry; I will answer all of that and go through how to make a CURA temperature tower.
Without losing any time, let’s get started with the whole process right away.
What is a 3D Temperature Tower?
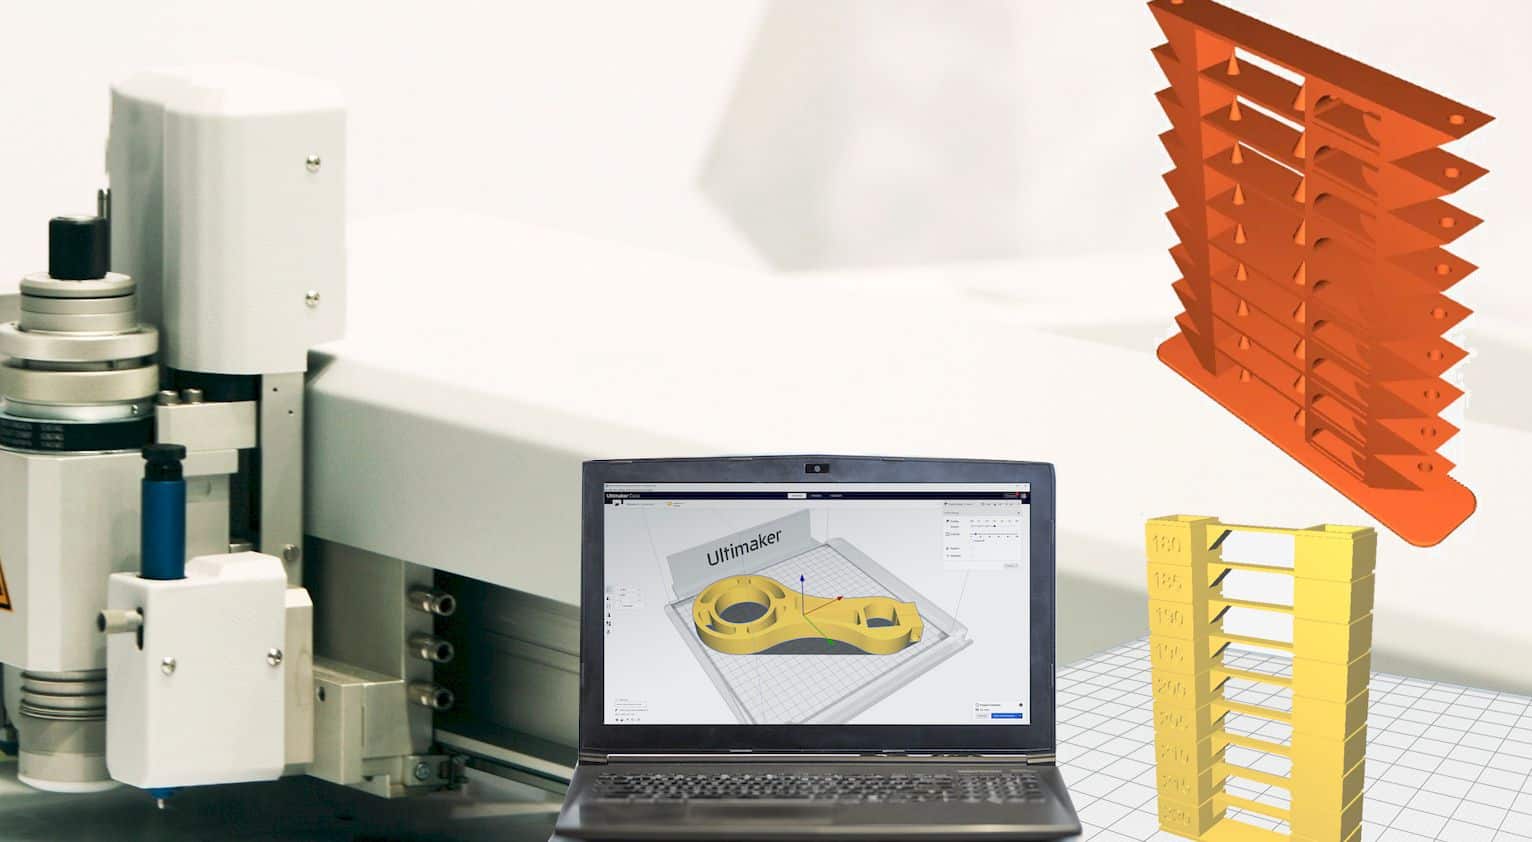
You can consider a 3D temperature tower as the guideline of temperature for your preferred print material. This is a tower printed using a particular material at different temperatures. This way, you can identify which temperature gives you the best quality of print for your material.
What you should be looking for here is defects and flaws in your temperature tower. See which temperature gives you the most flaws and defects. This way, you can avoid those temperatures entirely.
While you look for the flaws, you also have to be aware of the best temperature. Even though sometimes you may not get the perfect one right away, because different brands have different needs. Still, you can use the tower to find the standard temperature for your 3D printing material.
You will need a temperature tower whenever you have a new filament to work with. For every brand or material, you should make a temperature tower to get the guidelines. This way, you can end up with the best results on your printed models without worrying too much.
Related: Cura vs Simplify3d,
How to Use CURA to Create a Temperature Tower
Regardless of your printer, the following process is enough if you use the CURA software for your 3D printing. I will go through the basic process of making a temperature tower using the CURA software.
Before you even start with the process, make sure to download this plugin called ChangeAtZ. This is a plugin that allows you to create temperature towers most simply and easily. Once you add the plugin to your CURA software, you can move on to the following steps.
- The first noticeable thing you will need is the design file for the temperature tower. You can download different kinds of temperature towers from anywhere on the internet. Make sure to choose files that come with some guidelines.
- Then, you have to import that file into your CURA software. Then, choose a print profile as you would regularly do for the particular material you are working with.
- Now, you have to set the starting temperature. It has to be the same as the main temperature for printing. Usually, the main temperature of a temperature tower is indicated on the notes of the design file.
- For the infill density, you should start with 10%. But if there is a recommendation on the design file note, then you should use that.
- Then, you have to go to the extensions and click on post-processing. There you will find an option to modify your G-code.
- After that, you will see an option that says add a script. Select that and choose ChangeAtZ there. Usually, you can do this ten times with different values. You can also follow what the design file recommends to you.
- Now, you have to select two settings which are height and temperature. If you start with the highest temperature, you will go lower as you increase the height. The best setting is to keep improving the height by 5mm. As for the temperature, you should start with the highest temperature and start going lower with a 5-degree interval.
- If the design file recommends any other setting, then you will need to follow them accordingly.
- Once you have done all the settings, you should give the whole thing a recheck. You don’t want to make any silly mistakes like typos.
- After a proper recheck, you will need to slice the object using your software. This is a normal process you would do for your other prints as well.
- Then, please save the file on your SD card and then load it up in your printer.
- Finally, start the print and wait for the results to come out.
That’s all the basic steps that you will need to follow no matter what design file you choose. The 7th step here can be a bit confusing. So, I will try explaining that here a little so you understand the whole concept and idea.
Related: Ender 3 CURA Settings and Profiles For PETG
What you are doing on that 7th step is, you are creating terminals or trigger points where the temperature will change. Height is the trigger point here. For every different height, you will have a different temperature. That’s the whole essence of the tower, and you get used out of the temperature tower.
Now, there are several things to keep in mind. You must choose a proper design file that suits the material you are using. You can find a lot of temperature tower files on Thingiverse.
Also, if you don’t want to use the ChangeAtZ plugin, you can go for different plugins. A great alternative to ChangeAtZ would be the Calibration shapes you can find in the official marketplace of CURA software.
Other than that, you get most of the things in the design files. So, if you follow those settings correctly and make little adjustments, you can quickly get a temperature tower.
Related: PrusaSlicer vs Cura
Wrap up
To sum it up, a temperature tower can make your life much easier and better. You don’t need to worry about the temperatures every time you print. You can have a guideline of the perfect temperature for getting the best results all the time using a particular filament material.
Having this kind of help saves both your time and your filament. You won’t have to run tests before printing. You simply look at the temperature tower and see which temperature works best for you.
Contents