Don’t you know what G92 Gcode is? You’re not alone because many EMC enthusiasts these days are unaware of this code. Indeed, it is evolved into a universal programming language that drives all machines.
What’s more?
Interestingly, G92 G code can also use in 3D drawings with user-defined moves, which will move the Z-axis. So, for your own convenience, we want to help you keep up to date about this effective code for 3D printing. In that case, you should read the post till the end!
G-Code For 3D Printing
The G-code meaning is “General-purpose Code”. G-Code is a programming language used to control most equipment, especially 3D printers and CNC machines. It tells the printer where to go, how fast, and how much material to deposit.
This software uses a set of familiar commands such as G0 ahead in and G1 back one to move your 3D printer or CNC machine. Hundreds of commands exist to program your system.
In 3D printing, G-code can store in a text file on a computer connected to the printer. These text files can change using CAD software or programming languages like C++ and Python.
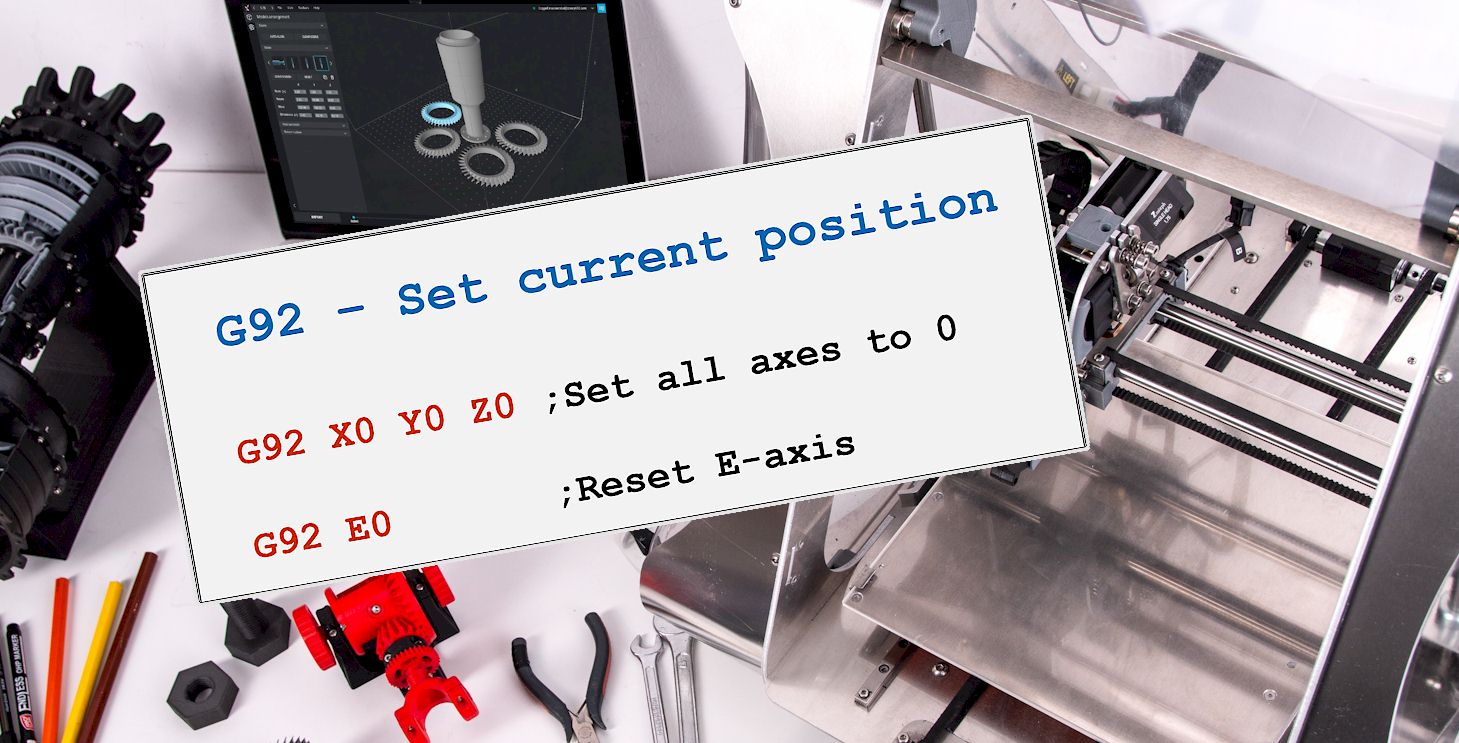
What Does G92 Mean In G-Code In 3D Printing?
G92 is an instruction in the g-code language that helps stabilize a 3D printer’s axis. You can use this G-code command to set your machine’s coordinates. In 3D printing, the g92 normally moves to a zero point on the work surface or G code set zero in space.
You can also use this G92 command to set the extruder position in 3D printing software such as Cura. It allows Cura to extrude before printing where to move or how steep your printer’s hot-end heater is.
This command sets work offsets on your system to compensate for physical or spatial offsets. For example, you can use the G92 command to 3D print or cut only a certain part of the build platform or at a specific height.
G-Code G92 for 3D Printing Axes
The three axes have different settings based on their movement type. The x-axis is the easiest to move because its movement pattern is linear and straight. Using the y-axis is harder because its movements constrain the x- and z-axes. The z-axis movement can be tricky because it is both linear and vertical.
The G92 command specifies a linear distance in the z-axis. Calculate the distance between the print bed and each axis. Upon completion of the instruction, the axes move to their new positions. This command uses your already determined x, y, or z values rather than computing them again.
This command uses to specify Axes position. This setting changes depending on what mode the G code applies and the orientation of your machine during operation.
The Benefits of G-Code G92 for 3D Printing
While g92 g-code is a common feature within 3D printing, it can be tricky to master. The most common use of the g92 g-code is to re-center the printer’s axis after an error.
Here is the benefit of g-code g92 for 3D printing:
- If a mistake occurs during printing, the printer must retrace. To avoid this problem, you can use g92 g-code to recenter your printer.
- Any errors on the first layer will result in a mirror image on the second layer. Using g92 can help fix these problems, preventing further damage to your print.
- It is tough to fix mistakes made during one step in a design. Using g92 can help change the direction on both axes and avoid this problem.
- If your printer only travels along one axis, you can use g92 to make it move along both axes. It will prevent damage to your print and will allow you to correct any mistakes as they occur.
G92 G-Code Common Challenges In 3D Printing
In this time, we will discuss some of the most significant challenges faced by 3D printers working with G92. If you’re running into these issues, then no need to worry. We’ll explore solutions and workarounds so that you can continue to enjoy your prints:
Missing Homing Addresses
When using G92, the printer will usually move at approximately 1mm per second. If you use the M119 command to view the current position, it will show you an integer number between 0 and 200. To inform your printer where it’s heading, you must define a corner in your g-code.
Left Side Problem
Moving the X, Y, and Z axes of any 3D printer in the x, y, z-axis will cause your g-code to print in its default position. Inexact printers on the z-axis can cause this. As a result, your Z will point to the left instead of down. Your Y will point to the right instead of down.
Facing A Large Print Issue
To print a huge object that requires numerous spool changes, break it into files. 3D models are commonly saved as STL files and sliced in G-code. When the model slice and the g-code is complete, your printer will halt printing and ask you to replace the file.
“Stuck” Nozzle Issue
The extruder assembly moves from one end of the print bed to another as your printer prints. Unretractable extruders are one of the most common causes of print bed failures. The solution is simple. Place a delay command at the end of your g-code to give your nozzle time to retract.
Nozzle Touch Issue
When printing with a chain, belt, or raft, the nozzle must touch the print bed at every layer change to avoid support material buildup. If your nozzle does not touch the print bed, layers will erupt outward instead of stacking up in layers.
Related: M420 S1 G-Code in 3D Printer
Final Words!
Hands down, you can use G92 Gcode in 3D printing in terms of adjusting the position of the print head in the best way possible. Furthermore, it’s able to correct errors that may occur during a print. Though you can face some challenges, it will give you the best result. So, why not give it a try, eh?
Contents
I’m not sure where you’re getting your info, but great topic. I needs to spend some time learning much more or understanding more.
Thanks for great info I was looking for this info for my mission.