Are you tired of sitting in front of your 3d printer for hours to monitor how level your bed is or how much your print temperature is? Look no further, I have the perfect solution for you.
After hours of research and testing the software around the current market, one software that caught my attention is Octopi Local!
Yes, this software took the market by storm when it was released. It provides a solution for every problem you have while 3d printing. To know more about it, let’s move further into the article.
What Does Octopi Local Do?
Octopi local is probably one of the most renowned software for 3d printing. Its wireless monitoring and controlling are better than anything any competitor has offered. Daily, thousands of printers if not hundreds use Octopi Local to function.
With tons of features and plugins, Octopi Local has taken remote 3d printers to a different level. Here are some features of Octopi Local
- It lets you upload G-code files from your device to the printer wirelessly.
- One of the most prominent features that no close competitor offers is it allows you to manually control your 3d printer. You can control X,Y,Z axes and force extrusion.
- Allows you to change print settings and keep an eye on the print temperature.
- Can set up a webcam to monitor using a browser
- Uses CuraEngine to slice up models
- Customization with several plugins
Besides, being compatible with almost every 3d printer to exist, the conveniences Octopi Local provides while letting you control and process 3d printing wirelessly is unheard of. No wonder hundreds of thousands of users are obsessed with it.
Related: Slic3r vs CURA
What Do You Need to Use Octopi Local
1. Single Board Computer
Before you jump into using Octopi Local, there are a few things that you need to take care of. First of all, you need a single board computer called ‘Raspberry Pi.’ This tiny computer has several models, but the versions of Raspberry Pi Octopi Local recommends is 3B, 3B+ or 4B.
The earlier versions of Raspberry Pi Octopi Local do not officially support it. You may find it compatible, but there may be performance issues and may badly affect your prints.
2. Power Supply
The power source is an essential thing in the world of technology. So it is vital to ensure that you have enough power supply for Raspberry Pi. As per Octopi Local’s website, every model needs a 5.1V supply.
3. Storage
The next thing you will need to run Octopi Local on your computer is a storage system that fits Pi. Which most probably will be a MicroSD. It is wise to get a 32GB card so that you don’t run out of storage.
4. Cable
The last and final thing is a USB cable. The task this cable will have is connecting the Raspberry Pi to your 3d printer. Before buying any cable, make sure to see which type your printer supports.
How to Download Octopi Local
Once you have all these things, you can download Raspberry Imager from Raspberry Pi’s website. Then proceed to follow all the steps Raspberry Imager says, like choosing os, choosing storage, etc.
Have you done all the steps? If so, then Octopi Local should start installing on your computer.
After selecting OctoPi, it will automatically download its latest version onto your computer. Rember to save a copy of your Raspberry pi username and password somewhere on your computer so that you don’t end up googling forgot Raspberry Pi login.
Securing Raspberry Pi
Securing our devices is a crucial factor nowadays. So for security, I will change the password that SSH into Octopi. The octopi default password should be raspberry, and the OctoPi default login is pi. I will change it to protect ourselves from attacks of possible hackers.
In order to do so, press Control+Shift+X to open the software’s advanced menu. Then click enable SSH and enter a username and password of your choice.
If your ‘octopi login incorrect’ pops up, you can always reset it by SSHing into the Raspberry Pi.
How to Login OctoPrint UI
Now that I have Raspberry Pi all set and plugged in and Octopi Local downloaded, it’s time to start using it. In order to access the OctoPrint interface, use by entering http://octopi.local into your web browser of choice.
And that should guide you into the login screen. If octopi.local/ does not work, then you have to use Octopi Local’s IP address.
Related: How to set up and use OctoPrint for Ender 3
How to Find Octopi IP Address
There are two significant ways of finding OctoPrint’s IP address. I will show you both steps below.
Step 1:
To start, go to ‘Windows File Explorer’ then you would want to open the network tab. Make sure your network sharing is enabled to see Raspberry Pi in the network tab. Once you see Pi in network sharing, right-click on it and then select properties to see your OctoPrint IP address.
Step 2:
Another way to find Octopi’s IP address is by using your wifi router. Find your router IP address, username, and password by accessing your router setting. When you find it, put into onto your web browser and search.
You will see a login screen when you search for the IP address. This is your router login screen. Enter all the credentials. Once logged in, you will find an option called connected devices.
Try to find the device named ‘OctoPi.’ Click on it, and you will find the IP address you are looking for.
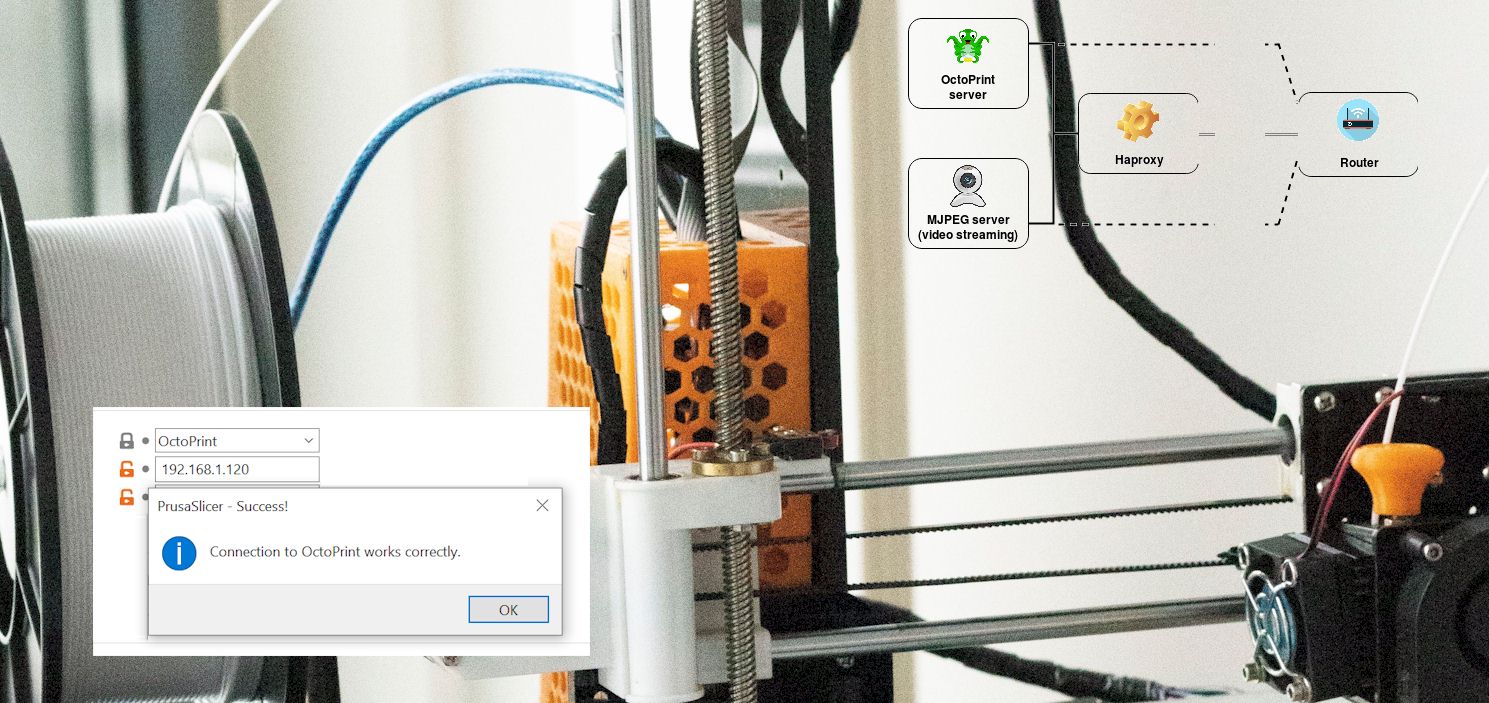
How to Login into Octopi Local?
If you used Octopi’s IP address, you would see a setup page open. There you will need to finish the first-time wizard setup. It is straightforward to do; just follow the onscreen instructions.
However, if you use http://octopi.local, you will be greeted with a login page. There you will use the octopi username password you set in Raspberry pi to log in. And you are done; you have successfully logged into Octopi Local.
Remember to Install Plugin
Now that you have finished logging into Octopi Local, you will be able to use all of its unique features. But remember to download plugins to enhance your experience even more.
One of its biggest perks is the plugs are open source, so you will be able to install plugins to visualize how the level your bed is, for creating time-lapse videos, or getting the power to remote control/ monitor your 3d printer while you aren’t at home.
Last Words!
By now, you should be able to understand why I said Octopi local is the first software everyone thinks of! Here, I tried to mention everything from how beneficial Octopi Local is for 3d printer users to a complete step-by-step guide on downloading it.
So if you are a 3d printer user, now you know which software to go for and how to get it, right?
Contents