When it comes to 3D printers, Creality Ender 3 is one of the very best options you can get. It’s affordable, excellent in performance, and compatible with a variety of filaments. However, one problem you may face with the Ender 3 is the stringing issue.
To solve that issue, you have to get the proper retraction settings for your printer. Now, please don’t be nervous, as we are here to guide you through the perfect Ender 3 retraction settings that will help you get rid of any stringing issues.
Let’s dive into the real thing without further blabbering.
Retraction settings for Ender 3
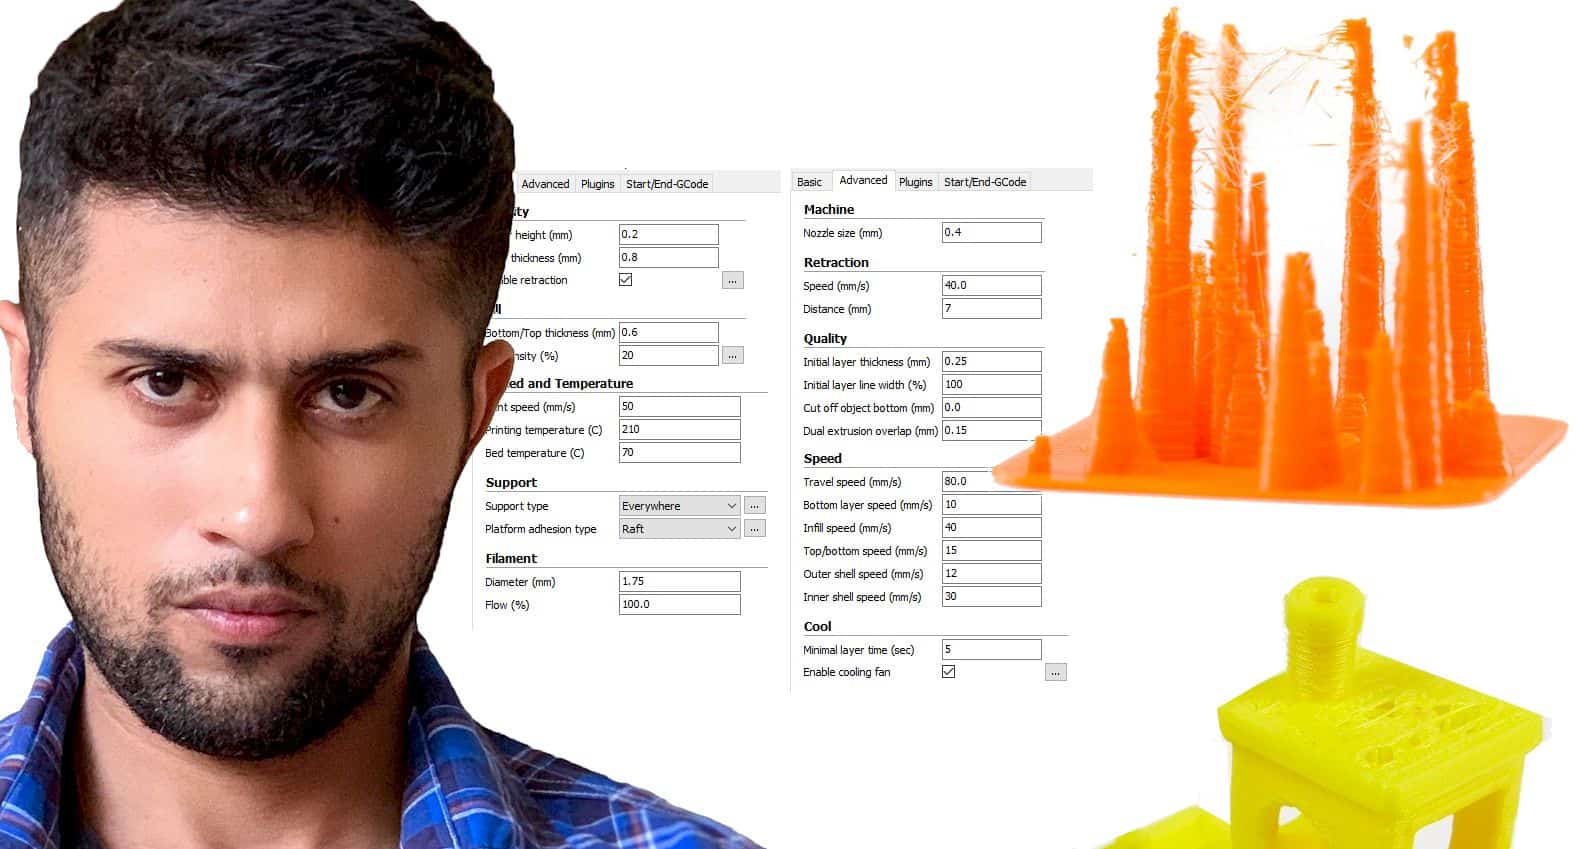
All the settings we will go through are done on the Cura software. So, we suggest following them along on this same software.
Setting up the software
Now, before you get into the settings, there are some things you need to do. First of all, you will need to make the settings visible on Cura software. By default, most of the settings are hidden. To make them visible, you go to the gear symbol you will see in the material section settings. There you will get an option called setting visibility.
Inside that, you will get a list of functions and tick boxes. Check all the tick boxes there. Then close the box. This will enable all the settings and options on the printing settings. Also, make sure to enable retraction so you can customize the settings.
Best retraction settings
First of all, let’s take a quick look at the settings you will do in the software. If you are short on time, then you can begin following these settings to start. Then make adjustments based on that. We will also go through the details of this process for better understanding. We highly recommend taking a look at that because it will be beneficial for making adjustments.
Here are the basic settings to try out; you will find these on the “Travel” section-
- Enable retraction: On
- Retraction Distance: 5mm
- Retraction Speed: 50mm
- Retraction retract speed: No change needed
- Retraction Prime speed: No change needed
- Retraction Extra Prime Amount: 0
- Retraction Minimum Travel: 1
- Maximum Retraction Count: 10
- Limit Support Retractions: Enable
- Combining mode: Within Infill
As a beginner, all these names will feel a bit overwhelming for sure. And you will have no idea what you are doing. That’s why we will go through the details of each option and explain why we prefer these settings.
Related: Ender 3 vs Ender 3 Pro
Retraction Distance
Even though this thing says distance, it works for the amount quantity of filament. The retraction distance decides how much filament will be retracted to avoid oozing amounts of filament. It becomes straightforward to understand with an example.
Let’s say you have set the retraction distance to 6mm. This means that the printer extruder will pull out 6mm in length from the hot end of the filament you are using. You can also think of it like you are putting 6mm less filament, which could have caused oozing.
Now, what amount should you keep here? It’s always better to start with 5mm. It’s the standard distance, and you can make adjustments from here on. The proper range of this distance is 2 to 7; if you keep it somewhere between that, you should be fine.
Going lower than that will not affect the stringing issues whatsoever because the excessive filament is still happening. And retracting too much can cause clogs and damage the nozzles. So, it’s better to keep its balance and get the best number that works for you.
Read Ultimate Guide – How to clean 3d printer nozzle
Retraction Speed
Retraction speed is as essential as the retraction distance setting for solving the stringing issue. The speed determines how fast the filament will be pulled from the hot end. Having trouble? Then let’s check out an example real quick.
Here, if you set the speed to 60mm/s, this means the extruder will pull out a 60mm filament every second. Now, when you combine that with the distance, it will all make sense. With the 60mm/s speed, you will be retracting a 6mm length of filament, which ends up in very less amount.
There are two additional settings you will see on the software. One is retraction retract speed which determines the speed at which the filament is pulled out. And the other is retraction prime speed which determines the speed for pushing out the filament for the next layer. You don’t have to change these settings, as they will adjust based on the core retraction speed setting.
So, what’s the proper retraction speed to have? Well, you can start in the middle with 50mm/s. It’s a standard speed from where you can go either up or down based on your needs. A tip for adjusting is looking out for filament damage. If it’s getting too damaged, then slow down the speed, and if it’s still oozing out, then increase the speed.
Retraction Extra Prime Amount
Here, you don’t need to change any settings if you have already set up the right retracting distance. It’s a compensation setting for the oozing filaments. Whatever setting you put this into, that amount of filament will push through after the printer gets into prime following a retraction.
So, if you can get the perfect retraction distance settings, you won’t have to worry about any compensation. This means you can keep at zero all the time while tweaking the retraction distance to stop stringing.
But if you feel like changing this, you also have to move around the retracting distance; altogether, the process becomes more complicated. That’s why we suggest keeping the value on this one at zero all the time.
Maximum Retraction count
This setting can be conducive for protecting your filament in every case. It decides how many times the retraction process will happen, and your printer will prime. On a practical concept, it controls the extruder retraction occurrence. This means how many times the extruder will retract the filament.
With the proper value on this, you can save up your filament from damage because of too much retraction. It limits the amount of retraction to the number you set here. Typically, it’s better to go for 10 maximum retraction counts. By default, the software will have 100, but that will be a lot higher than what you can have. So, start with 10 and then tweak around that spot to find your perfect setting.
Retraction minimum Travel
It’s related to the maximum retraction count settings we discussed above. This sets up the retraction amount of your filament within the maximum retraction number you set. So, if you have set the maximum retraction number to 10 and set this to 1mm, it will limit your filament’s retraction even further.
Now, the number you want to set here has to be around the retraction distance you set. If you set the retraction distance to 5mm, you would want this one around 3 or 4mm, or you can go 6,7mm. Find the perfect number that works for you.
Limit Support retraction
In this setting, you can either go for enabling or disable. The best course of action is going for enable. You can understand the reasoning for that very easily once you know what it does.
So, the limit support retraction allows a little bit of string. But this stringing happens within the structural support your printing may have. Now, you may ask, “Isn’t stringing a bad thing, then why are we allowing it?”. Well, yes, stringing is bad, but too much retraction is also bad.
When you have too much retraction, your printing will get much slower. And in some cases, the filament goes through a lot of damage as well. This is why you will need to find the right balance of retracting.
Don’t worry about your prints; with a balanced retraction, you will still end up with perfect prints; what happens to the support shouldn’t be your biggest concern? That’s why you will need to limit the retractions from the support so that you can find the perfect balance.
Related: how auto bed leveling works
Combing mode
Combing mode is a setting that protects your filament from too much damage. When you go into the tab, you will get to see 4 different choices that you can put here. It goes off, All, not in the skin and within the infill. Confused, aren’t you? Let’s clear that out right away.
So, when you keep the combing mode off, the nozzle will move around wherever it wants to. It’s a command that controls the nozzle movement. For the best results in your printing, you will want to set it to within infill.
Within the infill, the option will set the nozzle around the infill so it will have less unnecessary movement. Consequently, it results in lesser retractions which in turn will protect the filaments from damage. In short, you are trying to achieve that balance of retraction with this setting here.
Extra steps you can do
Well, you are done with the important and necessary settings for your Ender 3 retraction. But some extra points may help you in the process. It’s always better to know about these kinds of stuff. So, here they are-
Stringing test print
Well, this is an optional step that you can try or avoid. If you are 100 percent certain that your printer is stringing, then you can avoid this. But to test the limit of stringing, you can run a test. You can also do this after you have gone through some setting changes to test out their effect.
Get a test object and make sure to keep it very small. You don’t want to spend too much filament on a test. Then make a print of the object to test out the existing settings. This will show you the result of the settings you have, then based on that, you can make adjustments and changes.
Printing temperature
After you have done all the settings, you have to look at another key factor: temperature. This can also have an impact on stringing. You will need the perfect temperature for your printing to get the best results.
The temperature works like this; if it’s very hot, the filament that passes through the nozzle gets more liquid. That also causes the filament to come out faster through the nozzle. And as you learned earlier, too much filament can ruin your printing quality.
So, you will need a comparatively cold temperature and allow the filament to come out slowly. Don’t make any massive changes to the temperature. Make changes from 2 to 6 degrees Celsius and adjust it accordingly.
This is a different setting than retraction, but you have to keep it in check because it does affect the printing quality and causes stringing.
Retraction Settings of TPU, PLA, PETG, and ABS
Now, if you are wondering which settings works for which element, then you may be digging too deep. Still, to feed your curiosity, here are some settings you can try based on different filament materials.
You don’t have to change all the settings. You need to change the retraction distance and retraction speed for different filaments. Also, TPU doesn’t need any retraction settings.
Retractions settings for PLA
- Retraction distance: 6mm
- Retraction speed: 25mm/s
Retractions settings for ABS
- Retraction distance: 8mm
- Retraction speed: 40mm/s
Retractions settings for PETG
- Retraction distance: 6mm
- Retraction speed: 25mm/s
Final words
All in all, it’s about finding the balance of retraction. Don’t go overboard with these Ender 3 retraction settings; keep the balance at all times. With the proper values, you will get the best performance from this top-quality 3D printer for sure.
You can consider these values as a starting point and figure out where your perfect number will lie. Because these can vary based on the filament quality, printing conditions, the model you are printing, nozzle, and many other kinds of stuff.
Contents
