
Are you having some trouble with the nozzle of your Ender 3 pro printer? If so, then you can simply replace the nozzle of your printer. Don’t worry; I will complete the process to help you out.
Knowing how to change the nozzle Ender 3 pro can help you out a lot if you also want to upgrade the printer. Since the process isn’t that difficult, you can surely do it by yourself. I will be going through the whole process step by step. So, if you are wondering about the process, this is where you find the answers. Let’s get going.
Replacing the nozzle on your Ender 3 Pro
Well, first of all, replacing the nozzle on an Ender 3 Pro or V2 isn’t that difficult. Typically, it’s pretty straightforward for any printer in that regard.
There are typically 3 reasons why you would need to change the nozzle. Either you may have low printing quality, or the nozzle is broken. And the most common one is when your nozzle gets clogged up.
Before you can replace the nozzle, you always have to make sure that you will need to get the hot end heated. Once that’s done, you have to care about the tools you need to replace the nozzle. So, let’s take a quick look at that.
Tools required
You don’t need too many tools to remove the nozzle on your Ender 3 Pro. Here are the things that you will need –
- Channel-lock pliers or Crescent pliers
- Allen keys
- Combination wrenches
These are tools that you already have in your home. As for the combination wrench, you do get an open-end wrench on the packaging of your Ender 3 printer. So, you can use that pretty easily.
Related: How to clean 3d printer nozzle
Steps for replacing the nozzle on Ender 3 Pro
The steps you have to follow to replace the nozzle on your printer are pretty straightforward. Let’s start with them one by one.
Step 1: Removing the fan shroud
Now, it’s not necessary to remove the fan shroud of the printer to replace the nozzle. But removing it makes the job much easier for you. You can get easy access to the nozzle with the fan shroud removed.
Here’s what you do,
- You have to take your Allen key for the correct size of the two bolts you see on the fan shroud.
- Then, simply remove the silicone sock with your hands. You don’t need any tools for that.
After that, you can move on to the actual steps of changing the nozzle. You can skip this one if you don’t want to remove the fan shroud, as you can still return your nozzle without this step.
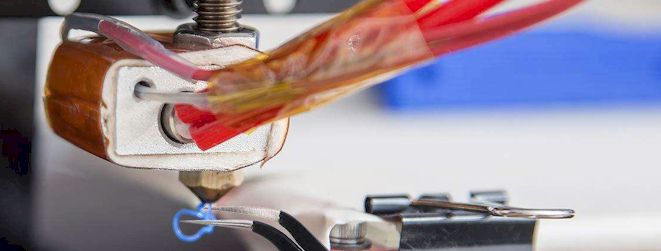
Step 2: Heating the hot end of the printer
Just like I said earlier, to remove the nozzle, you will have to heat the hotEnd first. Doing this loosens up the nozzle, so you can easily remove it. Here’s how you can heat the nozzle for removal –
First of all, go to your printer control panel. There you should find the temperature. Adjust the temperature accordingly to heat the nozzle. Also, if there is any filament left in the nozzle, then this is the best time to empty the nozzle before removing it.
Usually, using a temperature of 200 degrees should work out pretty well. As for the timing, just follow the same timing as you would do in a regular printing session.
Related: Ender 3 HotEnd Fix
Step 3: Removing the nozzle
Once the hot end is properly heated up, you can just start removing the nozzle. You can use the channel lock pliers or the crescent pliers to remove them. If you have none of them, you can also use regular pliers, but having those just makes the job much easier.
You have to hold the heater block with one hand and then use the plier with another to unscrew the nuts on the nozzle. Make sure to turn it clockwise otherwise, you will be tightening it further.
Don’t touch it right away when the nozzle is completely unscrewed from the slot. Because at that point, the nozzle will be extremely hot. So, let it cool down before you touch the nozzle. You can use the pliers to take it off.
Step 4: Installing the new nozzle
Before you start installing the new nozzle, I highly recommend you wait for a bit so the hot end can cool down. Once that happens, you can simply start installing the nozzle.
First, you can just screw in the nozzle manually with your hands. Then, use the wrench to tighten it. Be careful not to tighten it so much that it breaks down. Also, don’t tighten up the nozzle all the way, as there is another step that you have to go through.
You will need to heat the hot end before tightening because of the proper alignment. When you heat it, the threads expand, and make sure the nozzle is tightened properly and won’t come off.
Step 5: Heat the hot end again for tightening
This is a step that’s not necessary, but you should make sure the nozzle is installed correctly. Heat your hot end just like you did in the 2nd step. Then, start tightening the nozzle as you see fit.
Well, there is no good way to determine whether you have tightened the nozzle too much. You just have to practice and understand it by yourself.
Conclusion
To sum up, once you know how to replace nozzle Ender 3 pro, it’s pretty straightforward. As you can see, the process is very easy to follow through. And you won’t have to worry about getting anything out of the ordinary either. Just having the basic pliers can get the job done.
Now, you have to keep in mind while doing this to keep track of the tightness on the nozzle. Also, heating the hot end is crucial that you can’t avoid. Aside from that, there aren’t many risks or things to be careful about in the process at all.
Contents
